Secure Input on macOS
For Linux and Windows users
This section is only relevant for macOS users, so if you're using Windows or Linux you can safely skip it.
If at some point Espanso stops working and its icon becomes as shown below, it means Secure Input was activated:

Secure Input is a macOS security feature that prevents applications from performing all accessibility-related tasks, including Espanso's expansions, when inside a sensitive context, such as a password field.
Using Espanso inside password fields
This is the reason why Espanso won't work inside password fields on macOS.
Despite being a useful feature to improve the overall system's security, Secure Input is often unreliable, getting "stuck" in the Secure mode even when not necessary. In those cases, you'll need to "unlock" Secure Input for Espanso to start working again.
The most common cause for Secure Input "locking" is having a Password Manager activate in the background, but there could be other causes. Here's a list of possible workarounds:
- Close and reopen your Password Manager.
- If you're using a Password Manager Browser extension, close and reopen the browser.
- Launching the SecureInput auto-fix by clicking on the Espanso icon in the status bar and selecting
Launch SecureInput auto-fix, sometimes that helps. If the auto-fix is not working, or you want more information about it, please read the Auto-fix section. - Slowly close all applications until Espanso unlocks (you can see the regular icon appear in the status bar). With this process you can determine which application is causing the "lock".
- Logging out and logging back in.
- You can also examine the Espanso's log to get more information, although Espanso can't always tell which application is causing the Secure Input "lock".
Why does Secure Input get stuck?
Although the exact causes are not known (being implemented in the proprietary side of macOS), experiments show that Secure Input usually get "stuck" when an application request Secure Input while in the background.
To reproduce this behavior, I've created a small example page on CodeSandbox. Follow the instructions on the right to try it out.
Auto-fix
Espanso includes an experimental "SecureInput auto-fixer" which tries to go through some of the workarounds explained in the previous section automatically. It probably only works in the Catalina, Big Sur, and Monterey versions of macOS.
To launch it, you can click on the Espanso icon in the status bar on top, and then selecting "Launch SecureInput auto-fix".
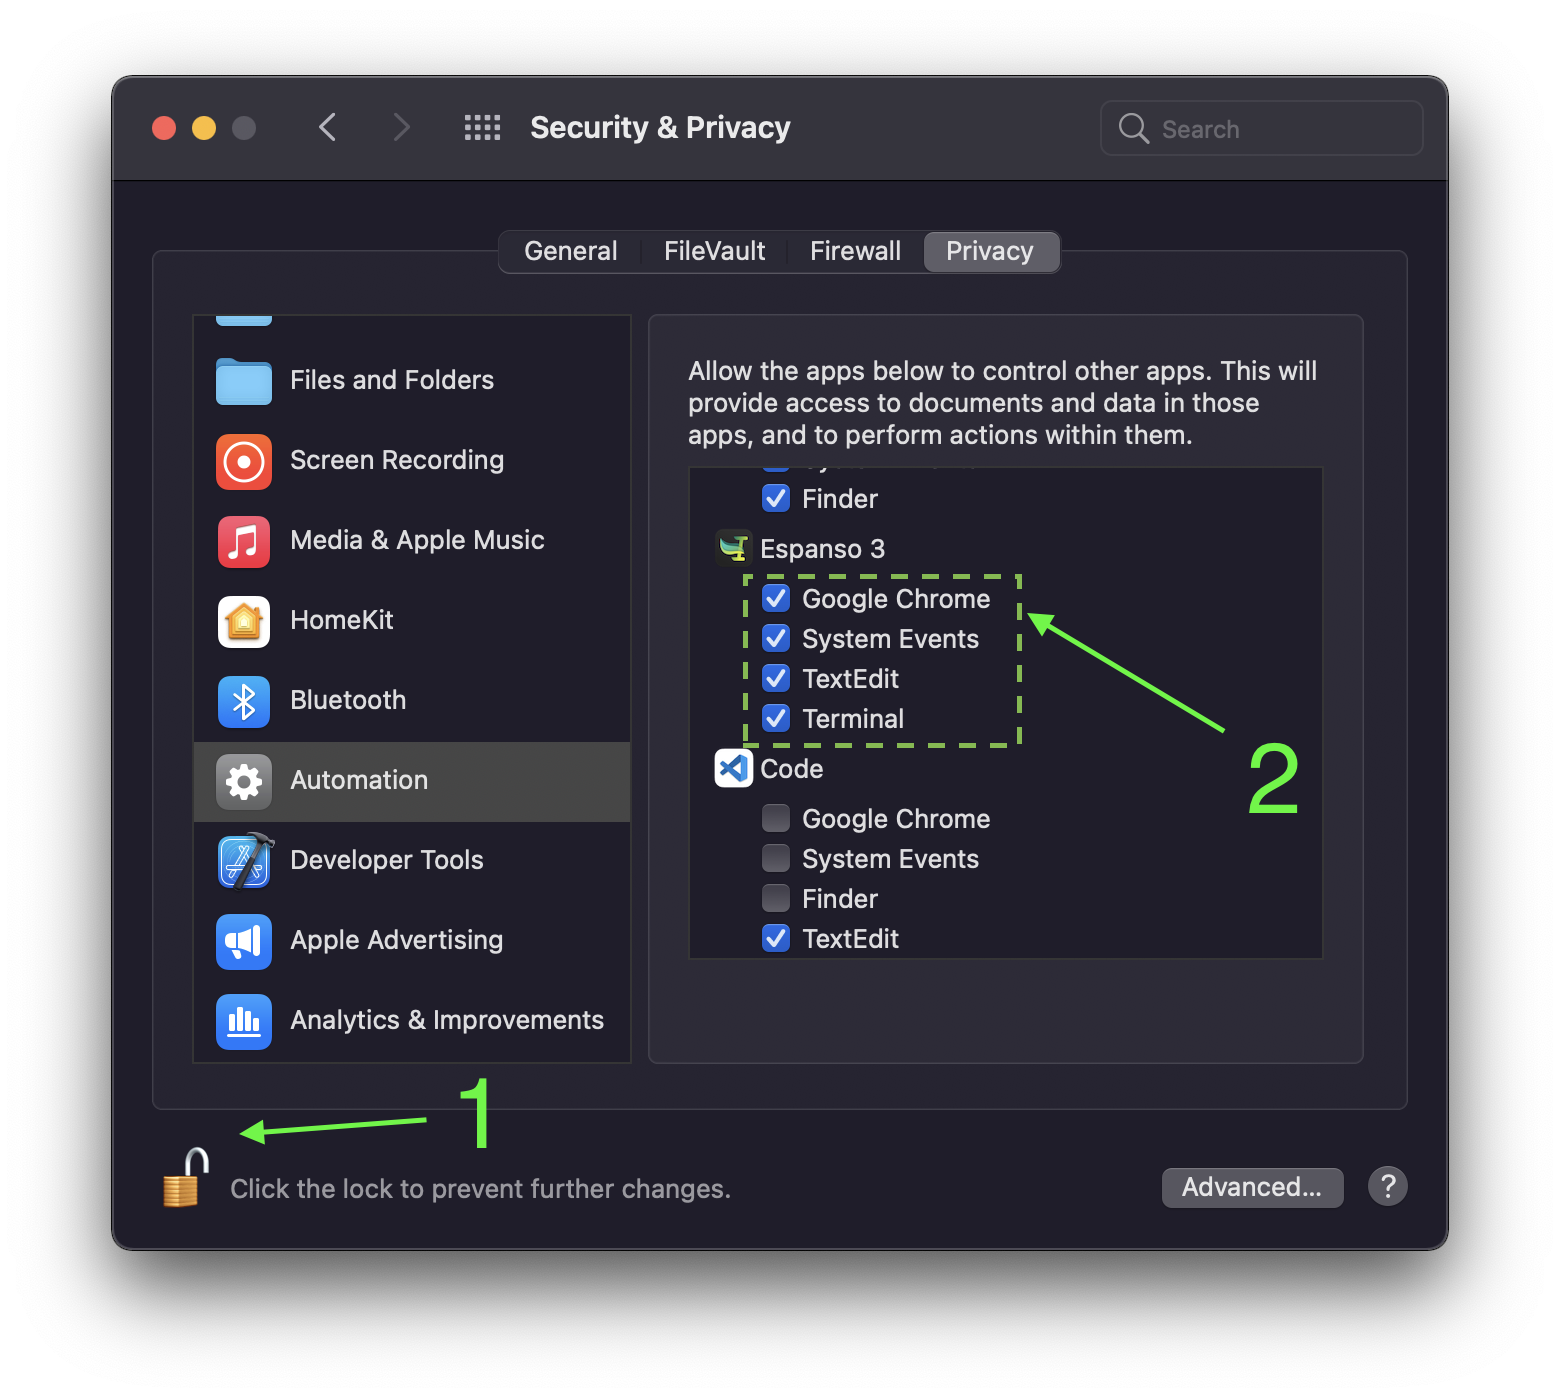
Keep in mind you might need to explicitly enable the Automation permissions in the System Preferences > Security & Privacy > Privacy tab > Automation, as shown in the picture below (first click on the Lock and then check all the checkboxes).

Auto-fix implementation
If you're curious about the actual implementation details, you'll find the auto-fix source code on GitHub.
